Let’s be honest—there’s something undeniably magical about a perfectly crafted cheese ball. It’s creamy, it’s flavorful, and it disappears faster than you can say “pass the crackers.” Whether you’re hosting a holiday party, attending a potluck, or just want to elevate your snack game, a homemade cheese ball is your secret weapon for impressing guests without spending hours in the kitchen.
The best part? You don’t need to be a culinary genius to pull this off. With a few quality ingredients and some simple techniques, you’ll create a showstopping appetizer that’ll have everyone asking for your recipe. Let’s dive into everything you need to know to make a cheese ball that’s absolutely irresistible.
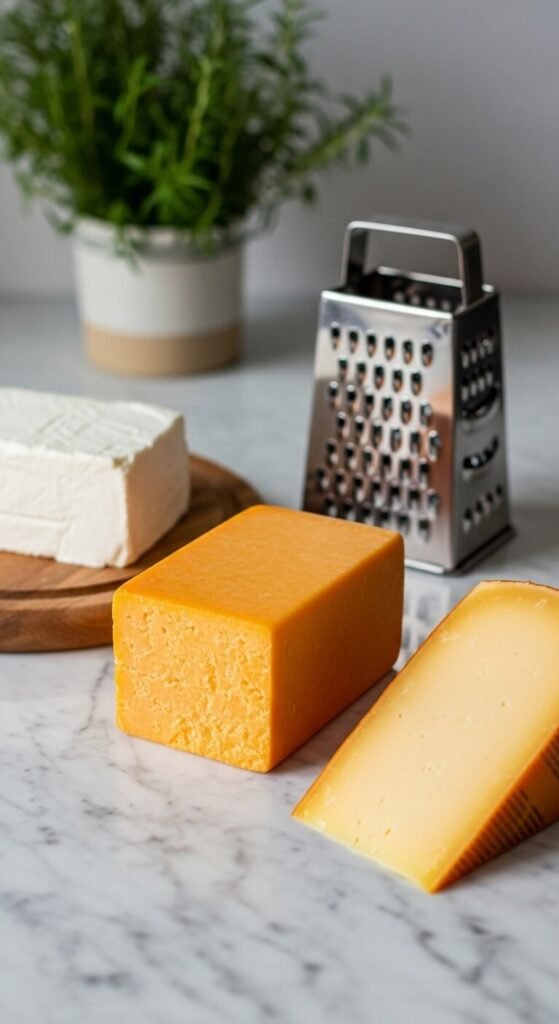
Choose Your Cheese Foundation
The foundation of any great cheese ball starts with the right cheese blend. You want a combination that’s creamy, flavorful, and easy to work with.
The winning combination:
- 8 oz cream cheese (softened to room temperature—this is crucial!)
- 1 cup sharp cheddar cheese, finely shredded
- ½ cup your choice of flavor cheese (blue cheese, gouda, or pepper jack work beautifully)
Pro tip: Always let your cream cheese sit at room temperature for at least 30 minutes before mixing. Cold cream cheese creates lumps, and nobody wants a lumpy cheese ball!
Mix in the Flavor Boosters
This is where your cheese ball goes from good to absolutely unforgettable. The add-ins create layers of flavor that keep people coming back for more.
Essential flavor additions:
- 2-3 cloves garlic, minced (or 1 tsp garlic powder if you’re in a pinch)
- 2 green onions, finely chopped
- 1 tbsp Worcestershire sauce
- ½ tsp smoked paprika
- Fresh black pepper to taste
Optional extras for personality:
- Crumbled bacon (because bacon makes everything better)
- Chopped dried cranberries for a sweet-savory twist
- Diced jalapeños for heat lovers
- Fresh dill or chives for an herbaceous kick
Mix everything together in a large bowl using a hand mixer or wooden spoon until completely combined and smooth. Don’t rush this step—proper mixing ensures every bite is perfectly balanced.
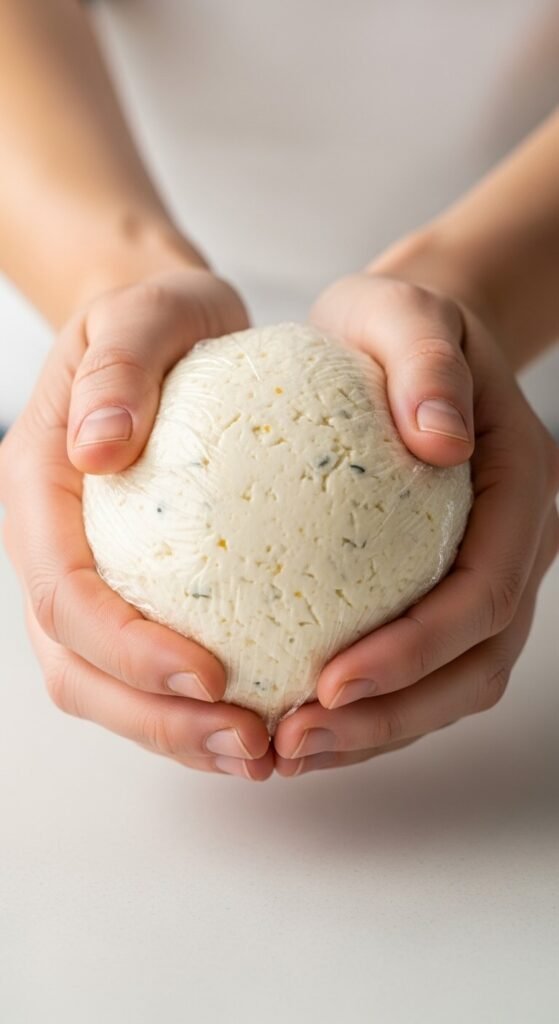
Shape and Chill Like a Pro
Here’s where patience pays off. Scoop your cheese mixture onto a large piece of plastic wrap, then use the wrap to shape it into a ball (or log, if you prefer). The plastic wrap method keeps your hands clean and helps create a smooth, uniform shape.
Pop your wrapped cheese ball into the refrigerator for at least 2 hours, but overnight is even better. This chilling time allows the flavors to meld together and firms up the texture so your coating will stick beautifully.
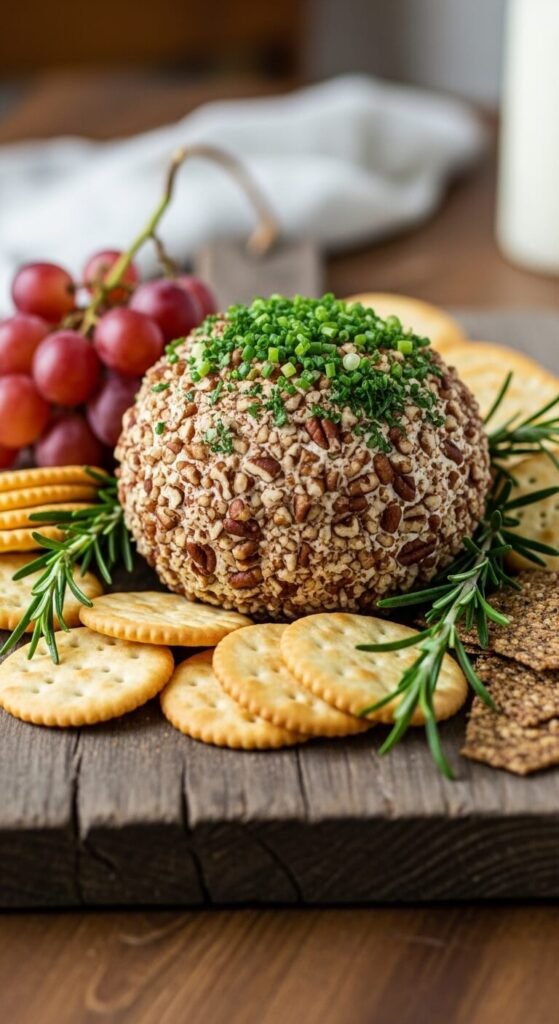
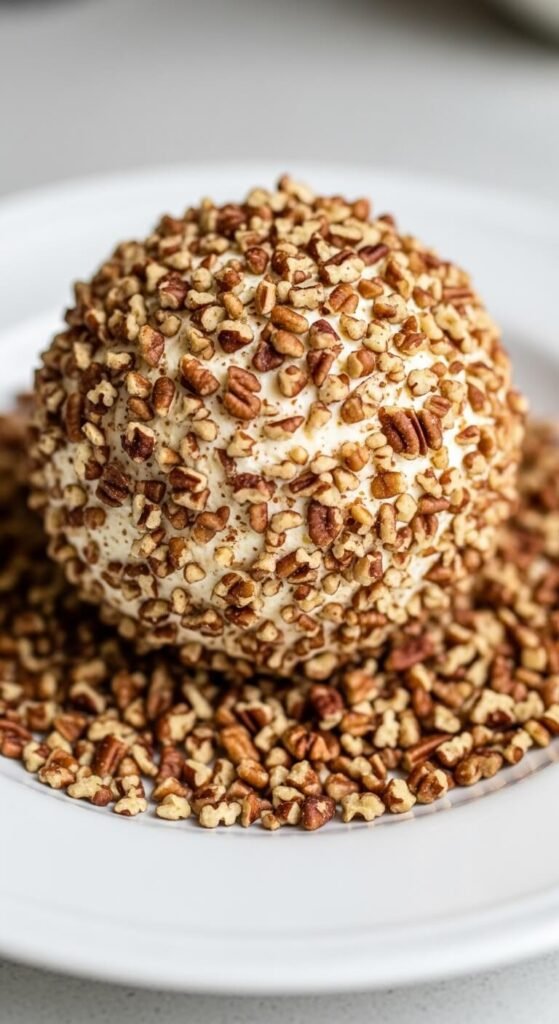
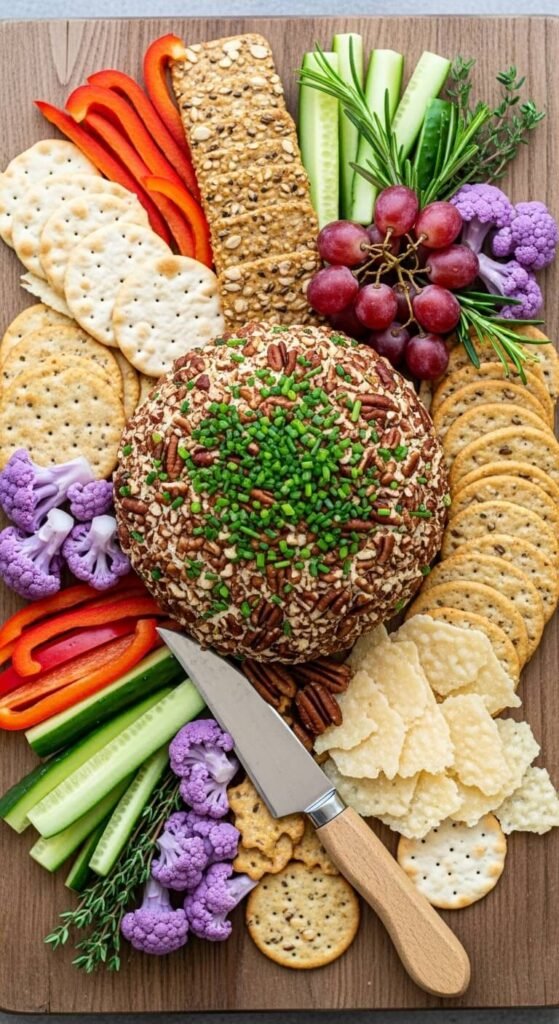
Create an Irresistible Coating
The exterior coating isn’t just for looks—it adds texture and an extra layer of flavor that makes your cheese ball truly memorable.
Popular coating options:
- Classic: Chopped pecans or walnuts (toast them first for extra flavor!)
- Herbaceous: Fresh parsley, chives, and thyme, finely minced
- Savory: Crumbled bacon mixed with green onions
- Spicy: Crushed red pepper flakes with parsley
- Everything Bagel: Everything bagel seasoning for trendy appeal
Spread your chosen coating on a plate, unwrap your chilled cheese ball, and roll it firmly until completely covered. Press gently so the coating adheres properly.
Serve It Right
Presentation matters! Place your finished cheese ball on a pretty serving board or plate. Surround it with an assortment of crackers, sliced baguette, pretzel crisps, and fresh vegetables like bell pepper strips and celery sticks.
Serving tips:
- Remove from the fridge 15-20 minutes before serving so it’s perfectly spreadable
- Provide a small spreader or cheese knife
- Garnish the board with fresh herbs, grapes, or nuts for visual appeal
Your cheese ball will keep refrigerated for up to 5 days, though it rarely lasts that long! You can also make it up to 3 days in advance—just wait to add the coating until the day of serving.
Your Turn to Shine
There you have it—everything you need to create a cheese ball that’ll have your guests raving and requesting encore appearances at every gathering. The beauty of this recipe is its flexibility; once you master the basics, you can customize it endlessly to match your taste preferences or party theme.
Ready to become the appetizer hero at your next get-together? Save this recipe for later, and don’t forget to experiment with different flavor combinations. Your perfect cheese ball awaits!