You know that moment when you bite into a crostini at a fancy party and it’s absolutely perfect? Golden, crispy, crunchy on the outside yet still tender inside, holding up beautifully under whatever delicious topping sits on top? Yeah, that’s not luck—that’s technique. And today, I’m sharing every secret to making crostini so good, your guests will think you hired a caterer.
Whether you’re topping them with creamy ricotta and honey, tangy bruschetta, or savory mushroom spread, the foundation matters. A soggy crostini ruins even the best topping. But get it right, and you’ve got the perfect vehicle for endless flavor combinations.

What Makes the Perfect Crostini?
Let’s start with the basics. Crostini (Italian for “little toasts”) are thin slices of toasted bread, typically from a baguette or rustic Italian loaf. The magic is in three things:
- The right bread – Not too soft, not too dense
- Proper slicing – Thickness matters more than you think
- The perfect toast – Crispy outside, slightly chewy inside
Get these three elements right, and you’re 90% of the way there.
Choose Your Bread Wisely
Not all bread is created equal for crostini. You want something with structure that can handle toppings without falling apart. Here’s what works best:
Best options:
- French baguette (the classic choice)
- Ciabatta (wider slices, great for heartier toppings)
- Sourdough baguette (adds tangy flavor)
- Rustic Italian bread
What to avoid:
- Soft sandwich bread (too squishy)
- Very seedy or grainy bread (can taste bitter when toasted)
- Day-old bread that’s already rock hard
Pro tip: Slightly stale bread actually works better than fresh because it has less moisture to release during toasting.
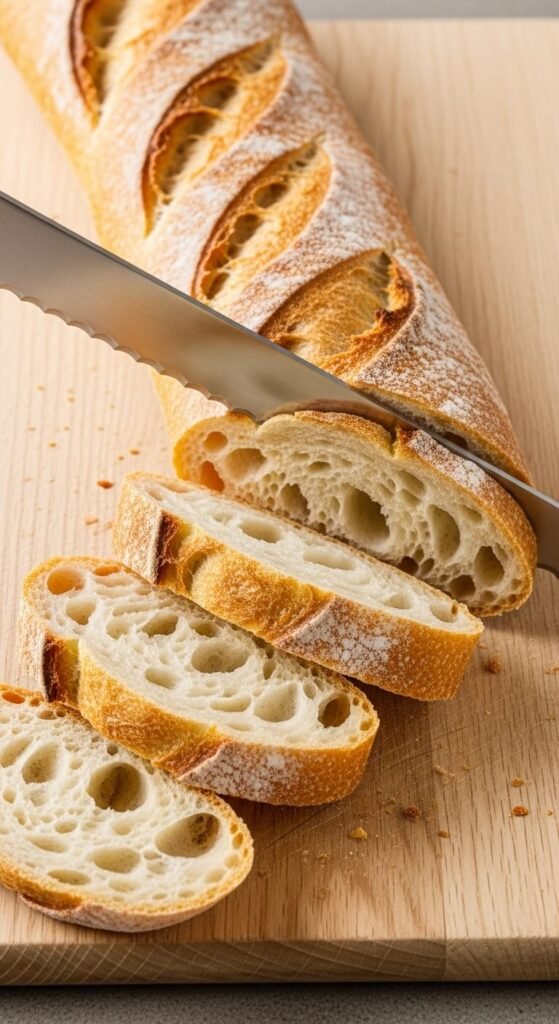
The Secret to the Perfect Slice
Thickness is everything. Too thin, and they’ll burn or shatter when bitten. Too thick, and they’ll be chewy instead of crispy.
The golden rule: Slice your bread about 1/2 inch thick at a slight diagonal. This gives you:
- Enough surface area for toppings
- The right ratio of crispy-to-tender
- An elegant, elongated shape
Always use a serrated knife and let the knife do the work—don’t press down hard or you’ll compress the bread.
Three Methods for Perfectly Crispy Crostini
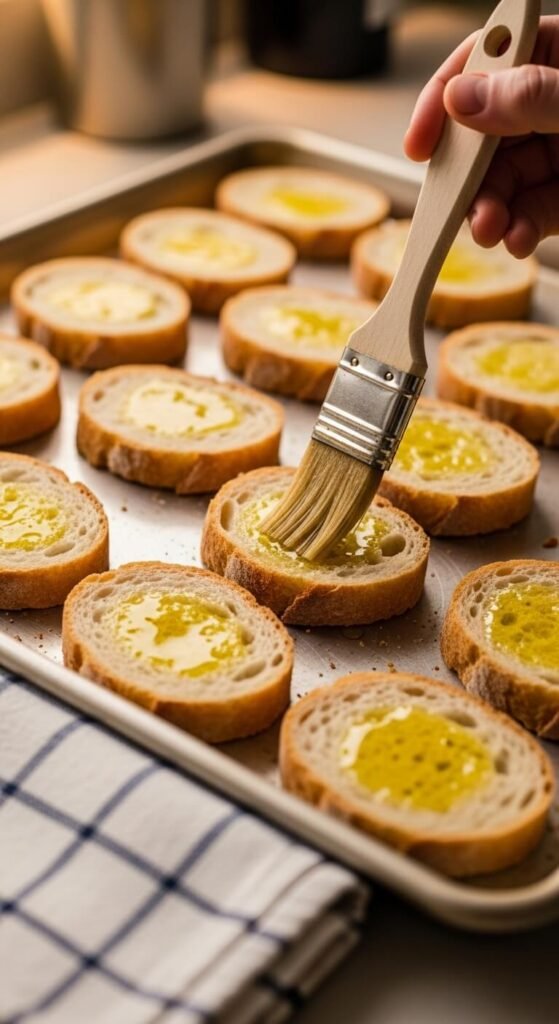
Method 1: Oven-Baked (My Favorite)
This is the most reliable method for even browning and perfect crispiness.
- Preheat your oven to 400°F (200°C)
- Arrange bread slices in a single layer on a baking sheet
- Brush both sides lightly with olive oil (don’t soak them!)
- Bake for 5-7 minutes, flip, then bake another 5-7 minutes
- Watch closely in the final minutes—they go from perfect to burnt quickly
Method 2: Stovetop (For Small Batches)
Perfect when you need just a few pieces.
- Heat a drizzle of olive oil in a skillet over medium heat
- Place slices in the pan (don’t overlap)
- Toast 2-3 minutes per side until golden brown
- Drain on paper towels if needed
Method 3: Grill (For Summer Vibes)
Nothing beats the smoky char from grilling.
- Preheat grill to medium-high
- Brush bread lightly with oil
- Grill 1-2 minutes per side, watching for grill marks
- Remove immediately when golden
The Garlic Rub Game-Changer
Here’s a restaurant secret: Once your crostini come off the heat while they’re still hot, rub them with a peeled garlic clove. The rough, toasted surface acts like a grater, releasing garlic oil into every nook and cranny. One clove does about 6-8 pieces. It’s subtle but so good.

Timing is Everything
The biggest mistake? Topping your crostini too early. Even the crispiest toast will get soggy if topped hours in advance. Here’s my timing strategy:
Make ahead (up to 3 days):
- Toast the bread completely
- Store in an airtight container at room temperature
Day of serving:
- Add toppings 15-30 minutes before serving for most recipes
- For very wet toppings (like tomato bruschetta), top right before serving
If they lose a bit of crispness, pop them in a 350°F oven for 3-4 minutes to refresh.
Crispy Crostini Success Tips
Let me leave you with my tried-and-true tips:
✓ Don’t oversaturate with oil—a light brush is enough
✓ Let crostini cool completely before storing (trapped steam = sogginess)
✓ Keep toppings on the drier side when possible
✓ Serve on a wire rack or parchment instead of directly on plates
✓ Room temperature bread toasts more evenly than cold

Your Perfect Crostini Awaits
Making crispy, professional-quality crostini at home isn’t complicated—it just takes the right technique. Master these basics, and you’ll have the perfect foundation for absolutely any topping your heart desires. From elegant dinner parties to casual weekend snacks, these little toasts are about to become your secret weapon.
Now go forth and toast! And don’t forget to save this guide for your next gathering—you’ll thank me when everyone’s asking for your recipe.
Pin this for later and let me know in the comments: What’s your favorite crostini topping?
Word count: 897 words