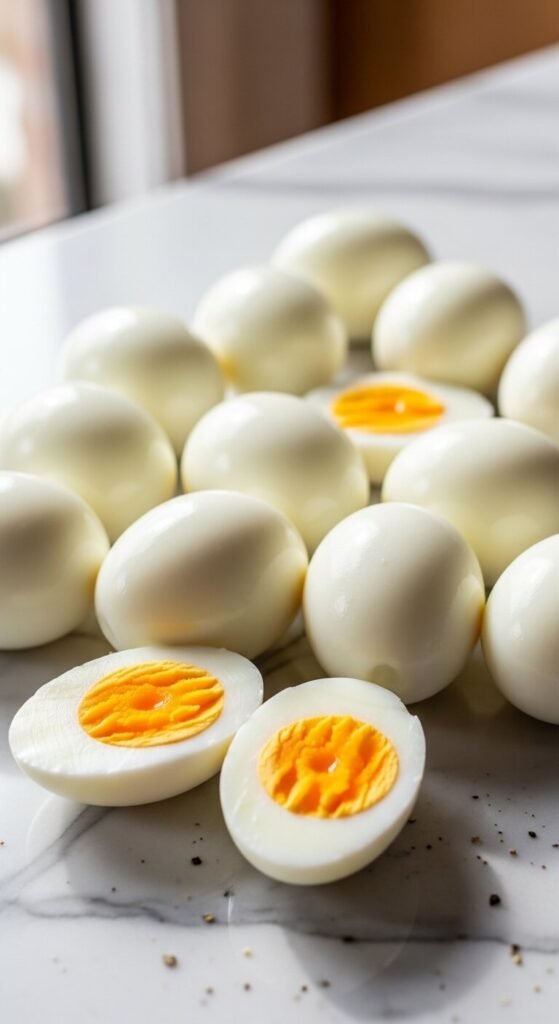
There’s nothing more frustrating than trying to peel a hard-boiled egg, only to watch half the white stick to the shell and crumble away. If you’ve ever struggled with pockmarked, crater-filled eggs that look more like a disaster than an appetizer, you’re not alone. The good news? Getting smooth, perfectly peeled eggs isn’t luck—it’s science. And once you know the tricks, you’ll be making picture-perfect deviled eggs every single time.
The Secret Starts Before You Even Cook
Here’s the truth most people don’t know: fresh eggs are your enemy when it comes to peeling.
I know, it sounds backwards. But eggs that are 7-10 days old peel significantly better than farm-fresh ones. Why? As eggs age, the pH level increases and the membrane between the shell and the white loosens. This creates a natural separation that makes peeling effortless.
Quick tips for egg selection:
- Buy your eggs at least a week before you plan to use them
- Check the “sell by” date and choose cartons with earlier dates
- Store them in the refrigerator until you’re ready to cook
The Boiling Method That Changes Everything
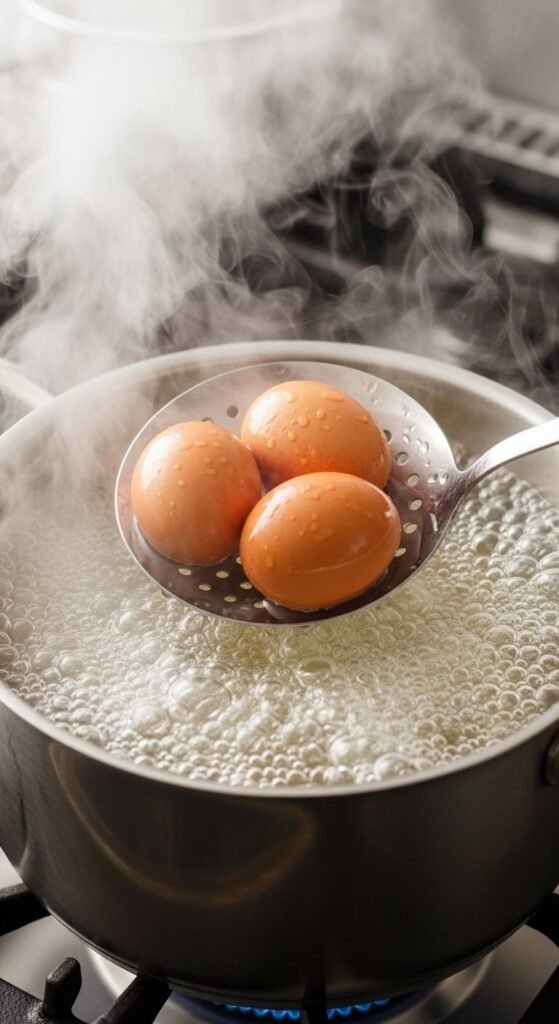
Forget everything you thought you knew about boiling eggs. The secret to easy-peeling eggs isn’t how you boil them—it’s when you add them to the water.
Here’s the game-changing method:
- Start with boiling water, not cold. Fill a large pot with enough water to cover the eggs by about an inch. Bring it to a rolling boil first.
- Gently lower the eggs in. Use a slotted spoon or a spider strainer to carefully place your eggs into the boiling water. This prevents cracking.
- Boil for exactly 12 minutes. Set a timer. For large eggs, 12 minutes gives you fully cooked yolks that are creamy and bright yellow—not gray or chalky.
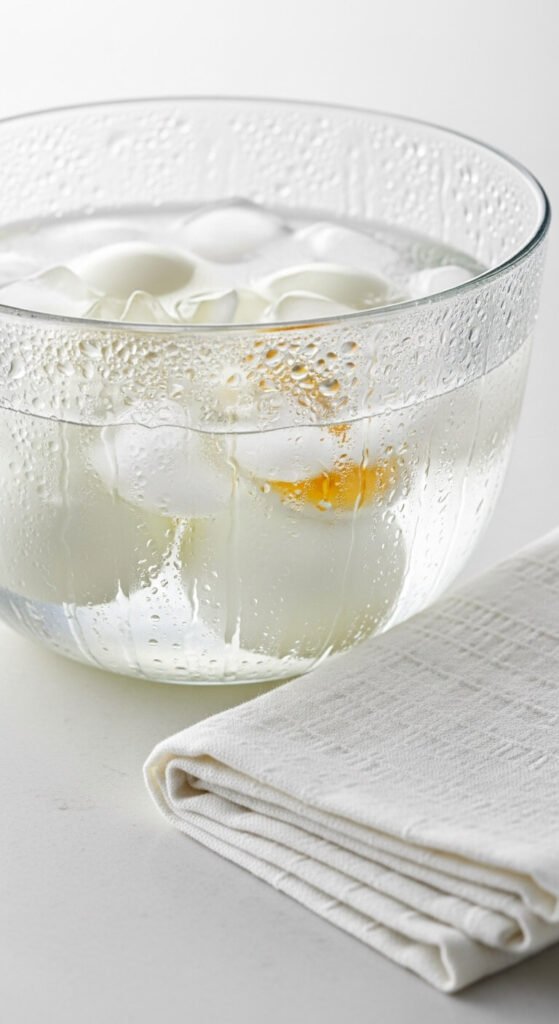
The Ice Bath Is Non-Negotiable
While your eggs are cooking, prepare a large bowl filled with ice and cold water. This isn’t optional—it’s the second-most important step after choosing older eggs.
The moment your timer goes off, immediately transfer the eggs to the ice bath using your slotted spoon. Let them sit for at least 5 minutes, but 10-15 minutes is even better.
Why this matters:
- The rapid temperature change causes the egg to contract away from the shell
- It stops the cooking process, preventing that greenish ring around the yolk
- Cold eggs are easier to handle when you’re ready to peel
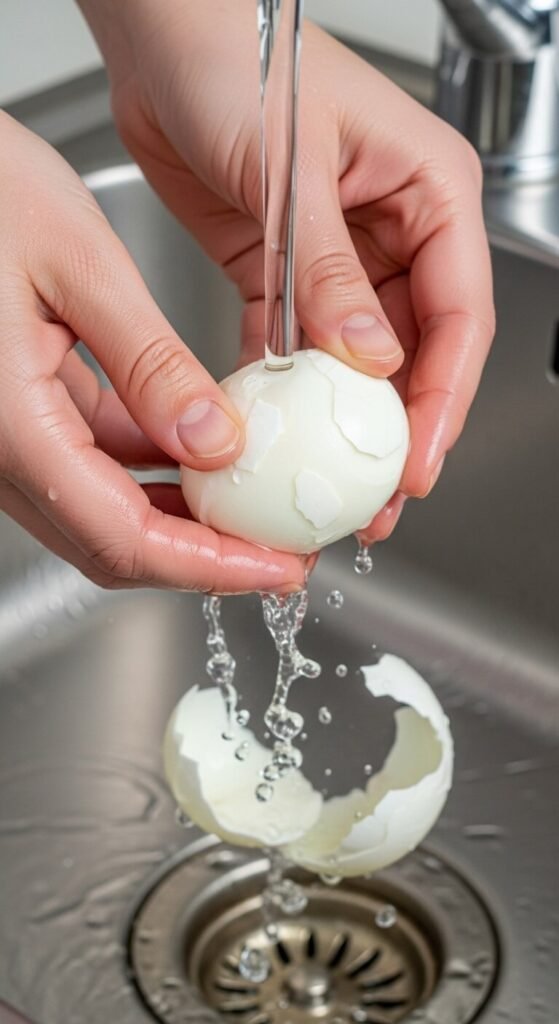
The Peeling Technique
Even with perfectly cooked eggs, your peeling technique matters. Here’s how to do it right:
- Crack the shell all over. Gently tap the egg on a hard surface and roll it between your hands to create a web of cracks.
- Start at the wide end. There’s an air pocket here that makes it easier to get under the membrane.
- Peel under running water. This is the final secret weapon. The water helps separate the shell from the white and washes away any tiny shell fragments.
- Go slow if needed. Sometimes patience pays off better than speed.
Making the Perfect Deviled Egg Filling
Now that you have flawlessly smooth eggs, it’s time for the fun part. Slice each egg in half lengthwise and pop out the yolks into a bowl.
Classic filling recipe:
- 6 hard-boiled egg yolks
- 3 tablespoons mayonnaise
- 1 teaspoon Dijon mustard
- 1 teaspoon white vinegar
- Salt and pepper to taste
Mash everything together with a fork until completely smooth, or use a hand mixer for an extra-creamy texture. Spoon or pipe the mixture back into the egg white halves.
Top with:
- Paprika for color
- Fresh chives or dill
- Crispy bacon bits
- Everything bagel seasoning

Your New Go-To Method
Once you master this technique, deviled eggs become the easiest impressive appetizer in your arsenal. No more embarrassing, chunky eggs. No more wasted time picking shells out of the whites. Just smooth, beautiful eggs that peel like a dream every single time.
Save this recipe for your next party, potluck, or Easter brunch—you’ll be so glad you did!