Imagine this: guests are 20 minutes away, you’re still in your pajamas, and there’s absolutely nothing prepped. Now imagine reaching into your freezer and pulling out a tray of perfectly portioned appetizers, ready to pop straight into the oven. No thawing. No stress. Just golden, crispy, crowd-pleasing bites on the table before the doorbell rings.
That’s the magic of freezer-ready appetizers — and once you know how to do it right, you’ll never host a party without them again.
Why Freezing Appetizers Is a Total Game-Changer
Batch cooking appetizers isn’t just a time-saver — it’s a lifestyle upgrade. Here’s why it works so well:
- Less day-of stress. Do all the messy prep work on a Sunday afternoon, then enjoy relaxed hosting all season long.
- No waste. Made too many stuffed jalapeños? Freeze the extras instead of tossing them.
- Consistent results. Freezing locks in freshness at peak quality, so your bites taste just as good weeks later.
- Flexibility. Pull out exactly how many you need — whether it’s 6 or 60.
The secret is knowing which appetizers freeze well, how to prep them properly, and what adjustments to make when baking from frozen.
Which Appetizers Freeze Best
Not every appetizer is a good candidate for the freezer, but plenty of crowd favorites are.
Great choices for freezing:
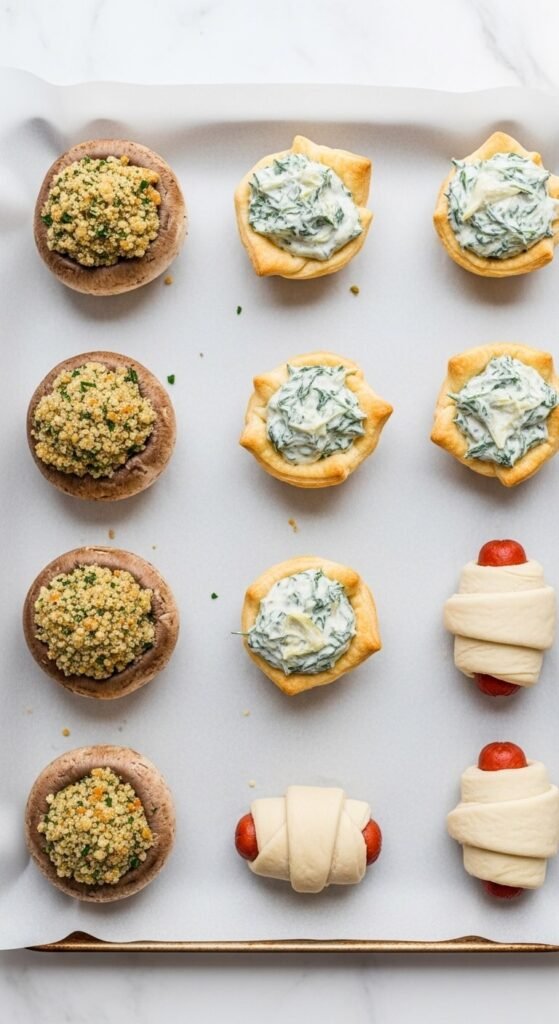
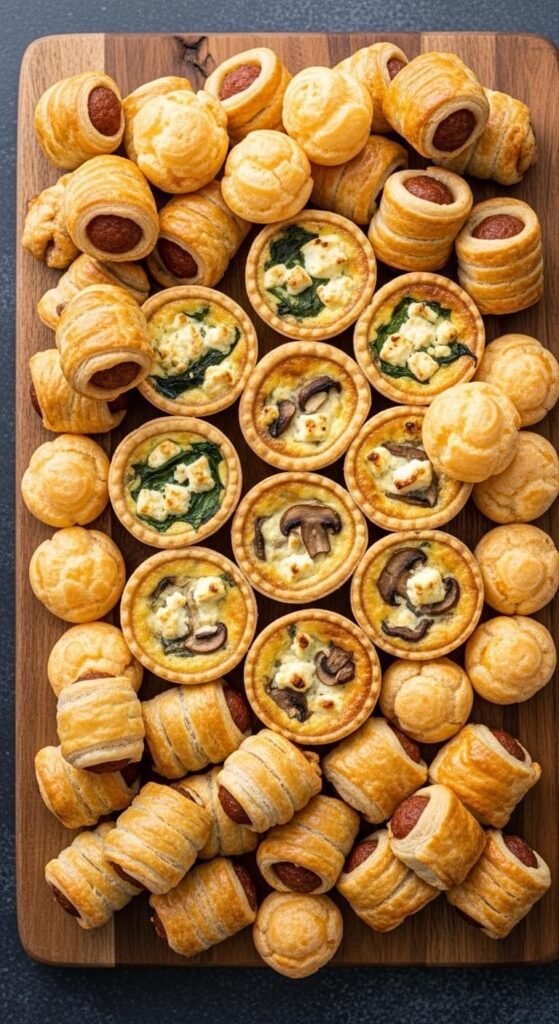
- Stuffed mushrooms
- Mini quiches and tarts
- Spinach and cheese puffs
- Pigs in a blanket
- Arancini (fried rice balls)
- Wontons and dumplings
- Cheese-filled phyllo triangles
- Meatballs
Avoid freezing: anything with a heavy mayo or cream-based coating, fresh lettuce cups, or anything with a crunchy breadcrumb topping already applied — those get soggy.
How to Freeze Appetizers the Right Way
This step is where most people go wrong. Follow this method and your appetizers will come out of the freezer looking and tasting like they were just made.
Step 1: Assemble but don’t bake. Prepare your appetizers fully — fill, stuff, wrap — but stop before they hit the oven. Freezing them raw or par-baked gives the best results.
Step 2: Flash freeze on a baking sheet. Lay your appetizers in a single layer on a parchment-lined sheet pan, making sure they aren’t touching. Freeze uncovered for 1–2 hours until solid. This prevents them from sticking together.
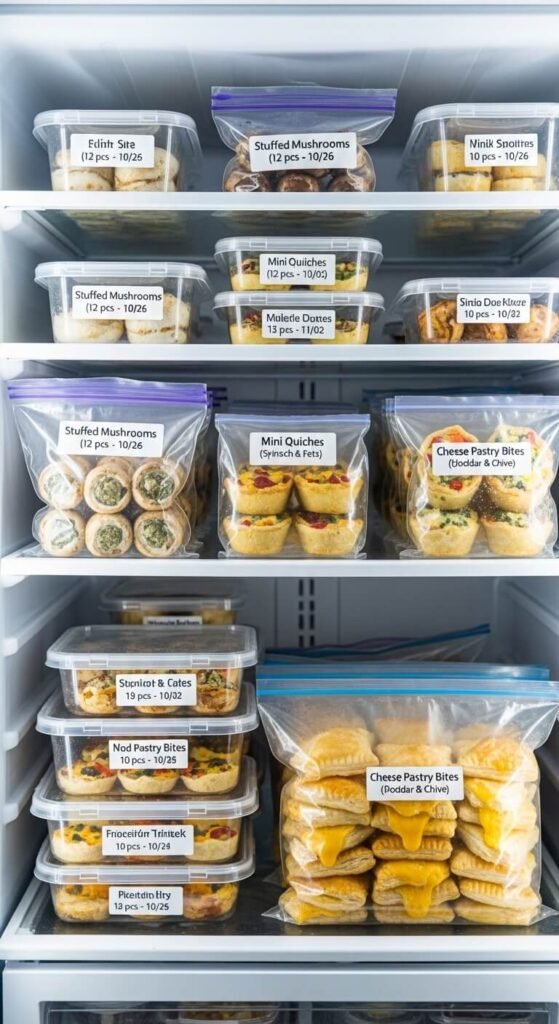
Step 3: Transfer to freezer-safe bags or containers. Once solid, move them into zip-lock freezer bags or airtight containers. Squeeze out as much air as possible to prevent freezer burn.
Step 4: Label everything. Write the name, date, and baking instructions directly on the bag. Future-you will be very grateful.
Most freezer appetizers keep well for up to 3 months.
How to Bake Them Straight From Frozen
Here’s the best part — you don’t have to wait. Pull them straight from the freezer and follow these tips for perfect results every time.

- Preheat your oven fully before the appetizers go in. A hot oven is non-negotiable.
- Add 5–10 extra minutes to the original baking time to account for the frozen center.
- Use a slightly lower temperature (about 25°F lower) for the first half of baking, then crank it up at the end for a golden finish.
- Don’t crowd the pan. Leave space between pieces so heat circulates and everything crisps up evenly.
- Check internal temperature for meat-filled appetizers — they should reach 165°F.
For example, if a recipe says bake at 400°F for 15 minutes, try 375°F for 10 minutes, then 400°F for another 10–12 minutes from frozen.
Pro Tips for Freezer-Appetizer Success
A few extra tricks that make a big difference:
- Brush with egg wash or butter after baking, not before freezing — it browns more evenly this way.
- Use parchment paper on the baking sheet every time for easy cleanup and even crisping.
- Rotate the pan halfway through baking for consistent browning.
- Let them rest 2–3 minutes before serving so fillings aren’t scorching hot.
Your New Secret Hosting Weapon
Once you build up a freezer stash of ready-to-bake appetizers, hosting becomes something you actually look forward to instead of dread. Set aside one prep afternoon, load up your freezer, and you’re covered for every last-minute gathering, holiday party, or Netflix-and-snack night for months.
Save this guide, share it with a friend who loves to entertain, and start stocking your freezer this weekend. Your future self — the one calmly greeting guests while golden pastries bake in the oven — will thank you.