There’s nothing more satisfying than a platter of tortilla roll ups sliced into perfect little pinwheels — each one neat, uniform, and practically begging to be eaten. But if you’ve ever tried making them only to end up with a squished, filling-spilling mess, you know the struggle is real. The good news? Clean, gorgeous slices aren’t a matter of luck. They’re a matter of technique.
Here’s everything you need to know to make tortilla roll ups that look just as good as they taste.
Start With the Right Tortillas
The foundation of a perfect roll up is — no surprise — the tortilla. And not all tortillas are created equal for this purpose.
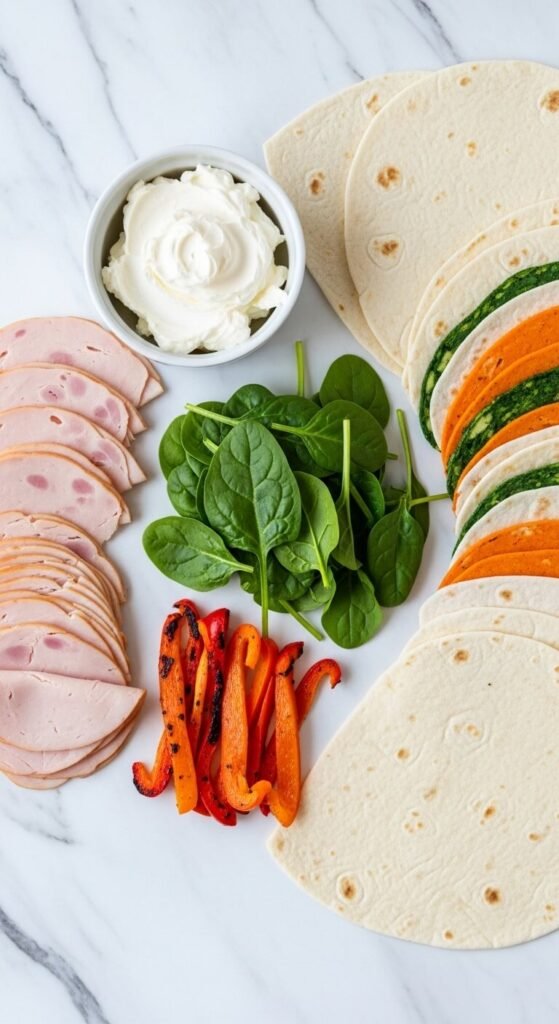
- Use large, burrito-size flour tortillas. They’re flexible, sturdy, and give you plenty of room to spread your filling.
- Bring them to room temperature before you start. Cold tortillas crack when rolled. Let them sit out for 10–15 minutes, or warm them briefly in the microwave (10 seconds — no more).
- Spinach or tomato wraps add a beautiful pop of color and make your pinwheels look extra impressive on a platter.
Avoid corn tortillas for this — they’re too stiff and will crack at the seams.
The Filling Formula: Thick, Creamy, and Not Too Wet
This is where most roll up disasters begin. Wet fillings = soggy tortillas = ragged, falling-apart slices. The key is a thick, spreadable base that acts as glue.
The best base options:
- Softened cream cheese (plain or flavored)
- Whipped cream cheese blended with sour cream
- Hummus (for a lighter option)
Tips for the filling:
- Pat any wet ingredients dry — roasted red peppers, cucumbers, and sundried tomatoes all carry moisture. Press them between paper towels before adding.
- Keep your filling layer thin but even — about ¼ inch thick spread all the way to the edges.
- Layer drier ingredients (deli meat, cheese, spinach) on top of the creamy base.
A popular crowd-pleasing combo: cream cheese + ranch seasoning + shredded cheddar + diced bacon + green onion. It’s simple, flavorful, and slices like a dream.
Roll Them Tight — This Is Non-Negotiable
A loose roll is the enemy of a clean slice. Here’s how to get a tight, even roll every time:
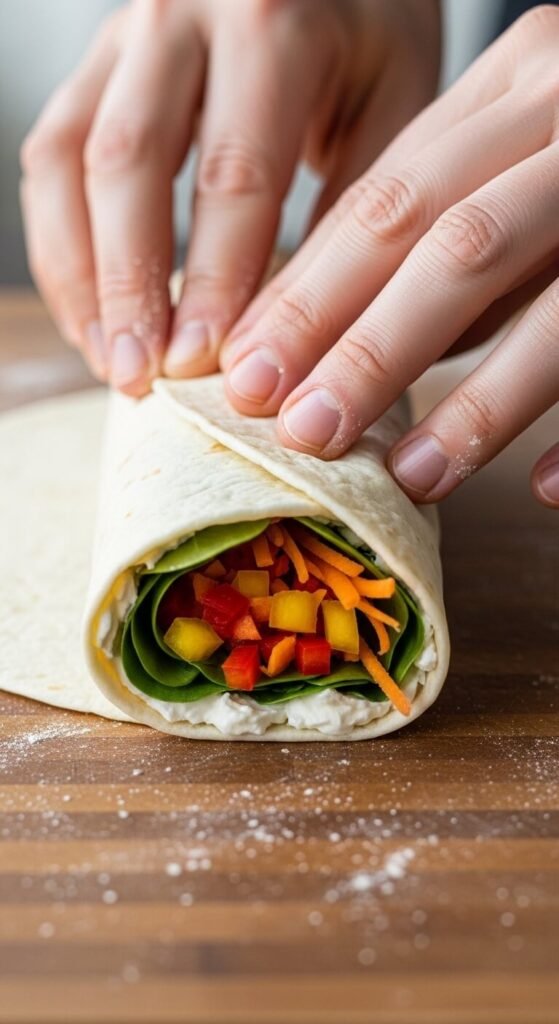
- Spread your filling all the way to the edges — leave just a ½ inch border at the far end so the seal holds.
- Start rolling from the edge closest to you, tucking firmly as you go. Think of it like rolling a sleeping bag — consistent pressure, no gaps.
- Roll tightly but don’t squeeze so hard the filling squirts out. Firm and steady wins the race.
Once rolled, wrap each one tightly in plastic wrap, twisting the ends like a candy wrapper. This holds everything in place and is the secret to clean slices.
The Chill Step You Cannot Skip
Here’s the most important tip in this entire article: refrigerate your roll ups for at least 2 hours before slicing. Overnight is even better.
Chilling does two things:
- It firms up the cream cheese filling so it holds its shape when cut.
- It lets the tortilla “set” around the filling, preventing unraveling.
Skipping this step is the #1 reason roll ups fall apart or look messy. Be patient — it’s worth it.
How to Slice for Perfect Pinwheels
When it’s time to slice, technique matters:
- Use a sharp serrated knife — a dull blade drags and tears.
- Use a gentle sawing motion rather than pressing straight down.
- Slice off the uneven ends (chef’s snack!) and cut the rest into 1 to 1½ inch rounds.
- Wipe your blade clean between cuts for the neatest edges.
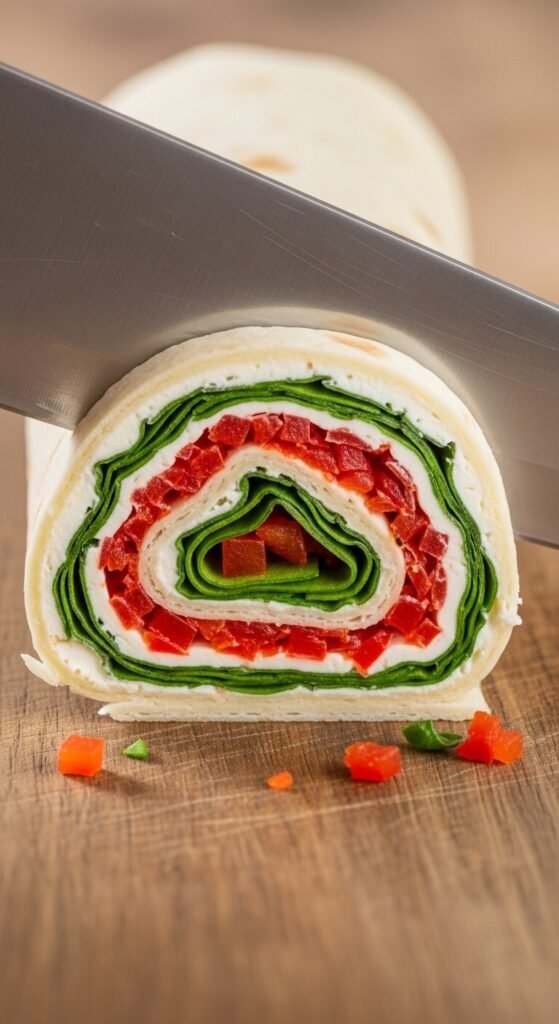
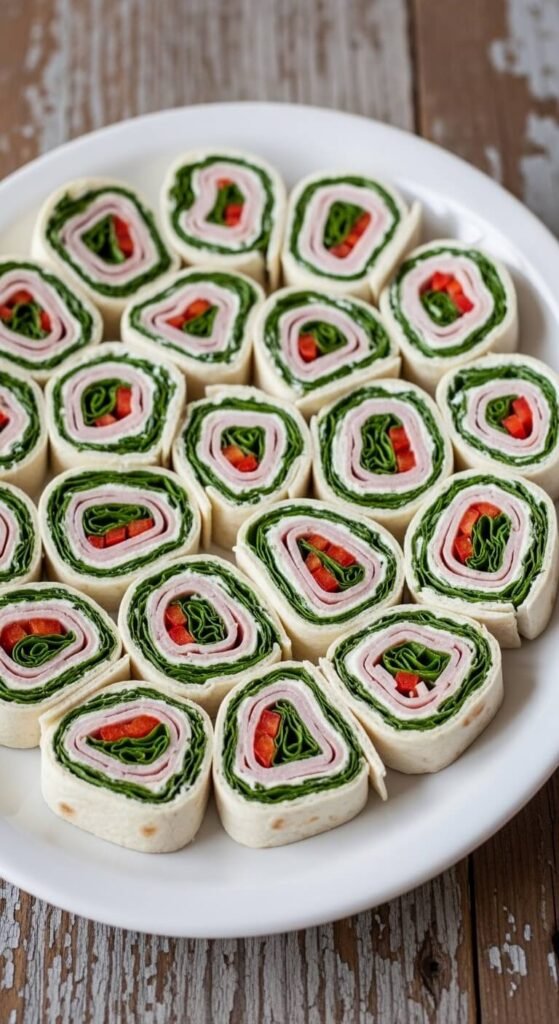
Aim for uniform thickness — a consistent slice is what makes a platter look professional and Pinterest-worthy.
Serving and Storing
Arrange your pinwheels cut-side up on a platter so everyone can see those gorgeous layers. Add a small bowl of dipping sauce (ranch, salsa, or guacamole) in the center for a finishing touch.
- Make-ahead friendly: Roll ups can be made up to 24 hours in advance and kept wrapped in the fridge.
- Don’t slice until you’re ready to serve — sliced roll ups dry out faster.
- Store leftovers in an airtight container for up to 2 days.
Final Thoughts
Perfectly sliced tortilla roll ups come down to three things: a thick creamy base, a tight roll, and enough chill time in the fridge. Nail those three, and you’ll have a party platter that looks like it came straight from a catering table.
Save this article for your next gathering — and don’t forget to share your pinwheel creations! 🎉